4x4Review Off Road Magazine
Do-It-Yourself Bed Liners – Durabak vs. Lava-Liner
By: Jody Campbell and Rick Webster
The one place that four-wheelers tend to neglect in their vehicles is the inside. We protect the outside with diamond plate, build extreme bumpers, use nerf bars, Rock slider rocker panels, and anything else we can think of, but we rarely protect the inside. Carpet is great for looks and light use, but gets abused by water, dirt foot traffic and the elements. That’s why we decided to test 2 products on the market. Durabak and Lava-liners new truck bed liner. Read on and find out who offers the best, toughest, durable and most eye appealing product.
Durabak
Durabak is a do it yourself truck bed liner made to take the abuse a 4 wheel drive vehicle will endure. Durabak is moisture resistant, sound dampening, oil, chemical and UV resistant. It is so tough it will not chip, peel or scrape. It is made from moisture cured polyurethane with recycled tires so it is glossy with a textured finish. Durabak was originally designed and used for industrial applications such as warehouse floors and walkway areas. Additionally, Durabak is available in Black, Dark Grey, Light Grey, Dark Blue, Light Blue, Forest Green, Dark Red, Yellow, Orange, Tan (Sand), Cream, and White.
After we received our gallon form Durabak, we decided to test it out in a Jeep CJ5. We were extremely impressed with this product compared to the other products we tested. It was easy to mix and apply, went on easily and looked great! Durabak was a clear cut winner in our side by side comparison with Lava-liner. While the Lava-liner also durable and resistant to abuse, they weren’t as easy to apply and the finished product didn’t look as good. See our installation page for a complete install of this great product.
Of course when you work with any chemical, you should wear gloves and eye protection. Take extra precautions to keep from getting Durabak on your skin. We got it all over our arms and clothes and couldn’t get the stuff off for 3 days! We called Durabak the morning after application to ask what would take this stuff off (we tried Lacquer thinner, turpentine, Avon’s Skin-So-Soft and soap). The folks told us we had good news and bad news… “The good news is, your Jeep is now impervious to 90% of the chemicals known to man, the bad news… so are your arms!”
Lava-liner
Lava-liner… the name itself commands durability. We received 2 gallons of the product and installed it in the cab of our ’74 FJ40 Land Cruiser. Lava-liner is a polyurethane based coating that can be applied to wood, glass, concrete, fiberglass and of course, metal. It is primarily used for protection against corrosion, chemicals and harsh environments as well as waterproofing, undercoating and as a protective liner over truck beds, utility vehicles, jeeps and other 4X4’s. Lava-liner, if applied to the body of a vehicle (inside of course) acts as a sound damper.
After we received our 2 gallons of Lava-liner, we started preparing our second test vehicle. (See the install on Lava-liner) The instructions said that we had about 20 minutes under ideal conditions to apply the 2 stage bed coating. However, after about 12 to 15 minutes, it started getting pretty thick so we had to hurry. Unfortunately, you can’t hurry on the vertical surfaces. It must be applied there very thin and two to three coats must be applied. On horizontal surfaces, the task is much easier. You can simply pour it and help spread it around a little, the rest takes care of itself with its “self leveling” capabilities. We found out the hard way that even the smallest amount of oil, grease or synthetic carpet fibers will either destroy the finish in the immediate area or cause it not to adhere. You must ensure the any area that will have Lava-liner applied must be completely clean and dust free. Additionally you must work quickly with this product so two or more people is a good thing.
We were disappointed with the product altogether. We followed the instructions to the letter and the vertical surfaces ran and sagged, the horizontal surfaces (for the most part) were lumpy and did not adhere in some small areas. The instructions read that the product should be applied under certain temperature conditions (which it was) and that the mixed product had a pot life of 20 minutes or so, which it did not. We were lucky to have 10 to 15 minutes.
With all of that said, Lava-liner without argument is the toughest of the 2 products we tested due to it’s shear thickness and flexibility. If you are lucky enough, you may end up with a great looking bed liner, but our tests showed differently.
Of course, when working with any chemicals, you should wear gloves and eye protection. We ended up getting some Lava-liner on our arms and hands, but Avon’s Skin-So-Soft took it right off. Something to keep in mind if you apply it yourself.
Product Installation
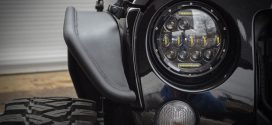
Durabak Installation – Installed on: 1977 Jeep CJ5
|
|

 The first step in preparing the vehicle for the Durabak, is completely clean all of the dirt and grime with soap and water. After the surface is completely clean and dry, scuff all of the shine off the surface with 80 grit sandpaper. Blow off the area to remove all of the sanding dust. Move the vehicle to a well ventilated area and wipe down all surfaces to be coated with Xylene and a clean cloth.
|
|
|
|
Finished Product Photos |
|
  |

 From this point on you will need rubber gloves to keep the Durabak off your hands. We found out just how durable this stuff is, we wore it on our hands for 3 days! After the Xylene has dried, you can apply Durabak. After opening the can you need to stir the product with an electric drill or metal paint mixer. Mask off all the areas you don’t want to apply Durabak on, including the bottom of the drain holes. To begin applying, fill all of the cracks and corners with a small paint brush dabbing it in. After you have sealed all of the seams and corners you can roll it onto the flat surfaces with a special stipple roller available from Durabak. As seen here, we had little room to work and had to paint ourselves in a corner so to speak. then we simply reached over and finished the painting. Apply a thin first coat and allow it to set up. Approximately 1-2 hours. After the second coat has been applied it will be ready for use in 6-8 hours.
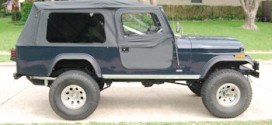
Lava-Liner Installation – Installed on: 1974 Toyota FJ40
|
These instructions were taken “verbatim” from Lava-liner’s web site. TAPING AND MASKING WIPE DOWN |
|
|
|


 Once you’ve completely prepared the surface, it’s time to start the application. First you will need to mix the activator with the actual Lava-liner itself. Pour in the entire bottle of activator and mix completely for at least 3 to 4 minutes with a paint mixing drill bit set on low speed. Once it is completely mixed, it’s time to start applying. apply Lava-liner to all of the vertical surfaces first with thin coats. Once all of the vertical surfaces are done, you can start with the horizontal surfaces. This part is pretty easy, we simply poured it out of the can and helped spread it around. Lava-line has an inherent ability to “self-level” and only needs a little coaching. You have to work fast with Lava-liner as it sets up pretty quickly.
Durabak Rating Card
| NOTE: All ratings on a scale of 1 to 4 with flat tires equal to a half. | ||
| Description | Notes | Rating |
| Ease of Install | Install took about 4 hours including preperation. |  |
| Ease of Use | N/A | N/A |
| Performance | N/A | N/A |
| Durability | Pretty darn durable! | |
| Appearance | Available in a whole slew of colors and with the glossy finsh and textured appearance, it looks great! |  |
| Drivability | N/A | N/A |
| Comfort | N/A | N/A |
| Price in comparison to related products | Roughly the same prices as Lava-liner but much cheaper than having a bed coating applied by someone else. |  |
| Was it worth it??? | Most definately! The great looks and durablility are much better than carpet for a truck or SUV that see the trails more than the street. | |
| Tools Required | Electric drill with 3/8″ chuck, paint mixing drill bit, paint brushes (4″ and 1 1/2″), Paint roller (3″ short nap), wire brush, wire brush drill bit, sandpaper, masking tape, old newspaper, rags and Xylene based solvent. | |
| Editors Notes | Durabak was my winner! It was easy to install, durable, sound deadening, it came in my color and did I mention that it was easy to install? 🙂 …JC | |
Lava-liner Rating Card
| NOTE: All ratings on a scale of 1 to 4 with flat tires equal to a half. | ||
| Description | Notes | Rating |
| Ease of Install | Install took about 7 hours including preperation. |  |
| Ease of Use | N/A | N/A |
| Performance | N/A | N/A |
| Durability | The most durable, hands-down! | |
| Appearance | If it’s applied perfectly, it looks great. Super glossy and smooth! HOWEVER, we had great difficulty getting our finish consistent. The floorboards were about the only portion of the entire rig that looked good. |  |
| Drivability | N/A | N/A |
| Comfort | N/A | N/A |
| Price in comparison to related products | Roughly the same prices as Durabak but much cheaper than having a bed coating applied by someone else. | |
| Was it worth it??? | I now have a SUPER durable cab in my cruiser but the appearance leaves something to be desired. |  |
| Tools Required | Electric drill with 3/8″ chuck, paint mixing drill bit, paint brushes (4″ and 1 1/2″), Paint roller (3″ short nap), wire brush, wire brush drill bit, sandpaper, masking tape, old newspaper, rags and Xylene based solvent. | |
| Editors Notes | Durabak was easier to install than Lava-liner and looked better with it’s multiple colors but Lava-liner is more durable. Just make sure to work fast but be thorough…RW | |