4x4Review Off Road Magazine
|
Last month we told you about something new… Something that just about any home-built or highly modified 4-wheel drive probably couldn’t do without. We received word of a new product from a company who’s made it their business keeping rigs cool, and is now making a great product to keep your rig warm. Flex-a-Lite Consolidated, the makers of the famous Flex-a-Lite auxiliary radiator fans (and many other cooling system goodies) have released an aftermarket, do-it-yourself auxiliary heater. In our case, it wasn’t an auxiliary unit, but a replacement. We tossed the old, leaky, eye-sore of a so-called heater that comes stock with the FJ-40 Land Cruiser for something more efficient, produces warmer air and looks a helluva lot better. Enter the Mojave heater, a compact unit measuring in at 12.12″ deep, 9″ wide and just 5″ tall that can be mounted under your dashboard, under a seat, or on any other flat surface. Made primarily as an auxiliary heater, this little powerhouse moves 140 cubic feet or air per minute and sends a thermal blast of 12,000 BTU’s. The Mojave heater isn’t an electric heater that will rob your alternator of needed juice, but works with your engines existing cooling system. No different than the heater core all stock vehicles (sans air cooled engines) use anyhow. You can also use this heater inline with your existing heater and heater hoses using brass T-fittings to heat the back of an SUV, pickup or other chilly areas in your rig. The unit comes standard with wiring and a threeway switch, but you’ll have to supply the heater hose and brass fittings (optional). We ordered ours with the optional ‘air plenum’, which is essentially a snap on cover that provides two round, directional vents and a side vent that can be used for a defroster. Below you’ll find out how easy it was to get some warm air flowing into out chilly Cruiser on those cold mornings. Installation took about 3 1/2 to 4 hours to complete.
Installation As usual, with any electrical work, disconnect the negative (ground) wire on your battery to prevent any stray voltage, sparks or fires during the installation. Our first actual step was to locate a suitable place to mount the Mojave heater. We had several options but wanted a location that was easy to wire the electrical components, route the heater hoses to it and be out of the way of flailing knees or rising water should we decide to do a little ‘Baja’ing’ or deep water fording. We found that the best lace for us was in front of the passenger seat, directly under the glove box in our FJ-40. If you own a Jeep, this location should work, but you won’t be able to bolt the heater directly to the glove box because it’s made of cardboard. Once we had our location in mind, we started the installation by marking the areas where we would drill the holes to secure the heater to the glove box. This took a bit longer than usual because the computer for the fuel injection and the Jacob’s Pro Street system were mounted *inside* the glove box. After about 30 minutes of jockeying things around, our heater was securely fashioned for the time being. We chose to split the wiring harness in half by using an aftermarket, quick-disconnect plug. (see photo on right) You’ll need some special tools to do this and you can pick them up at your local electronic supply store. Splittin the loom in half will allow us to easily remove the heater should we need access to any areas around it. With our new heater wired and mounted, we decided to see how much air this sucker would really blow. We connected the ground cable to our battery, put the ignition into the run position and turned the heater on to the low position. The low position is equal to that of a newer vehicle’s low setting; as is the medium setting on the Mojave as well. However, the high setting on the switch moved much more air that we anticipated. In fact it approached that of my wife’s hair dryer in relation to the force of the air (not the volume)! Surprised and excited by the amount of air this little, auxiliary heater produces, we couldn’t wait to finish our last step… hooking up the heater hoses and putting this heater through it’s paces. With everything hooked up, we fired up the motor and took the old FJ-40 our for a spin on a brisk and cool afternoon. After about 5 minutes, with the motor running at a nice 180 degrees, we kicked the Mojave heater into high gear and had the interior of our soft-top FJ40 nice and cozy warm in just a few minutes. The Mojave heater puts out a massive amount of air and we were able to boost the heat displacement a bit by installing a 195 degree thermostat in our motor. That’ll melt the shoe polish of your shiny loafers!
|


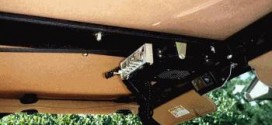
 The next step in our installation was to mount the 3-way, rotary switch into the dashboard. We drilled the recommended hole and test fit the switch. With everything in order, our next step was to supply power to the switch. Our new wiring harness from Centech Wiring has 15 or so auxiliary, labeled wires such as the wire in the photograph labeled “HTR FAN”, which is a high amperage supply
  straight from the fuse box. This alleviated our need for the wiring and inline fuse supplied within the Mojave heater kit. Next, we grounded the heater and ran the yellow, red and orange wires from the heater box to the switch and wired them in the appropriate and labeled positions.
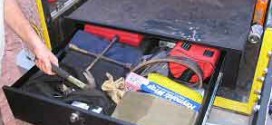
  Hooking up the heater hoses proved to be the easiest step in our installation of the Mojave auxiliary heater. Our Land Cruiser had an engine swap some time back and we installed a late-series Chevy 350 mill. We haven’t had our stock heater hooked up since the mill was transplanted so all we had to do was make a quick trip to the local hardware store for some barbed-threaded pipe fittings that would screw into the intake manifold and the water pump of our motor. We then bought about 15 feet of heater hose to route from the motor-side fittings to the copper tubing on the side of the Mojave heater. Plumbing the heater hose from the motor to the heater took all of about 20 minutes and was a snap. We spent a few extra bucks and bought a flush kit system from our local automotive parts store. The flush kit system, if you’ve never used one, is a simple plastic T-fitting which goes inline with one of your heater hoses. This allows you to hook a garden hose to your heater hose and flush the old, nasty goo out of your cooling system and replace it with fresh coolant-water mixture.