4x4Review Off Road Magazine
 Protection – it’s what my ol’ man used to harp about when I was a teenager. Now that I’m into my thirties, I’ve finally figured it out… Keeping the sides of my beloved Jeep from being bashed to hell – that’s what he was trying to explain to me all along.
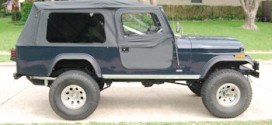
Which brings us to protecting our ’04 Jeep Rubicon for an upcoming trip to Tellico ORV park, just outside of Murphy, NC. We heard that BDS was coming out with a new set of rocker guards that feature a tubular step, so we called up our friends and ordered some ‘protection’.
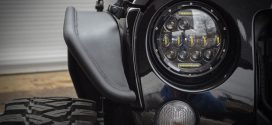
This latest creation from BDS comes in the form of a pair of, heavy-duty rock sliders made from stout, one-piece 3/16″ formed, plate steel. They’re beefy as hell and the integrated 1.75″ tube-step will be sure to keep the can openers away from your precious sheet metal. Available in a gloss black or a textured “Rubicon black” powder coat, the rocker guards sport a laser cut “BDS” logo on the body plate – showing your vehicle’s colors right through it. Hey BDS, sell these sliders in an unfinished version so we could paint to match!
Installation
 We headed over to our local BDS dealer, XTreme Jeep Sales in Tampa, Florida to get started. The first step was to ditch the factory sliders and clean the body. We then put the new BDS rock sliders into place using a jack stand and a wood block – they fit perfectly. Next we mounted the weather stripping, sticky side to the sliders, which keeps the mud, moisture and dust out of the area between the body and the new BDS parts.
With a helping hand from one of the guys at XTreme Jeep, we held the sliders in place while I marked and drilled the side and bottom holes for the rocker panel using a 5/16″ and 3/8″ drill bit. With the holes treated for rust prevention, we then installed the body inserts and frame spacers, then tightened the nuts and bolts to complete the 2 hour installation.
While the directions were accurate and well illustrated, we did run into a snag. We found that on 2003 and newer Jeeps, the body is molded slightly differently which caused a slight deviation for us in our install because we had to use a threaded insert on the furthest-to-the-rear mounting holes, of the side and underbody. A Quick call to BDS got them going on a future solution.
Once the sliders were installed we noticed that we lost no ground clearance as compared to the OE rocker guards. There is however, a huge difference in the strength and stability over the stock sliders and quite a few others on the market we looked at prior.
If you looking for easy to install, rugged and cost effective rocker protection, then look no further than BDS and their super- tough products. These rocker guards, like many other BDS products also feature their “No fine Print” lifetime warrantee, which states that if you are the original purchaser and their product fails, BDS will replace it without question.
|
||||||||||||||||||||


| BDS Suspension |
| 102 S. Michigan Avenue Coldwater, MI 49036 Phone: 517-279-2135 Fax: 517-278-2316 Email: [email protected] Web Site: www.bds-suspension.com |